


Mastering 3D Character Design – A Complete Beginner’s Guide
20 June, 2025
Learn the full 3D character design workflow for beginners, from concept to portfolio, master sculpting, texturing & rendering with this step-by-step guide.
3D character design is at the centre of today’s creative industries, whether it be games, movies, VR or digital avatars. For entry-level professionals, with so many tools, workflows, and technical processes available, it can be a bewildering experience.
But the process of mastering 3D character design is simple — you don’t have to do it all at once — it necessitates a structured, repeatable workflow that will allow your creativity to flourish.
In this guide, we will outline the entire workflow for 3D character design for beginners, examine common mistakes to avoid, identify the relevant software for 2025, and explore how to build a professional portfolio to get noticed.
Why 3D Character Design is the Skill of the Future:
Characters put life into digital worlds. It doesn’t matter if you’re designing stylised game avatars or hyper-realistic creatures for film; 3D character design sits at the nexus of art and technology.
The demand for creative design is increasing, and more studios, indie developers, and creative teams are constantly seeking professional designers to balance both creative design and technical implementation in their production pipelines.
The best part is that you don’t need a lot of experience to get started, but you will need a methodical workflow, which is what we will outline in this guide.
The Complete 3D Character Design Workflow
1. Idea and Concept
Every good character starts with an idea. Start gathering references: anatomical references, costumes, expressions, and even mood boards – these will guide your thinking and make it easier to visualise your creation.
Draw loads of thumbnails. Alter the proportions, poses, and personalities of your character; you’ll find lots of great ideas you can develop after you find the character silhouette you like.
You may always think about good silhouette design – a strong, interesting, and recognisable silhouette is great for readability; you want it to stand out.
If you want to take a closer look at the whole process, check out our full breakdown:
[Learn the full 3D character design workflow process →]
2. Blocking and Base Mesh
Now you’ve developed your concept, it’s time to get that 2D imagery into 3D. The blocking phase is an initial modelling stage where you use simple shapes, such as spheres, cubes, and cylinders, to block out the character.
You want to avoid thinking about small details too much at this point (i.e. don’t jump into tiny sculpting details) but focus on making large structural and proportionate decisions as well as the pose and balance.
In the blocking phase, you have the freedom with sculpting software like Blender or ZBrush to not worry about structure since you can easily rebuild upon it during the next phases.
3. Sculpting and Refinement
Your character is starting to develop.
You’ll first build up the main forms: torso, limbs and head.
Then the secondary forms are where you can add muscle groups, joints, and facial planes.
Finally, you can add all the finer details, wrinkles, skin pores, fabric folds and so on.
One of the most common mistakes for beginners is to sculpt tiny little features too early, only to realise later that their proportions don’t quite feel right. Always focus on the big forms and refine them downwards.
4. Retopology and UV Mapping
Once you’ve completed your sculpt, your model is now ready to be optimised for whatever you’re animating, Rigging or for use in a game engine.
This phase of work will retopologize the high-res sculpt into a low-res model for more efficient modelling or rigging and create a final production model that is ready for use.
UV Mapping follows the retopology of the model. This process unwrapped the model into flat surfaces to ensure clean textures can be applied to them.
Poor cleanup of a model’s topology or UVs can destroy even the best-sculpted models, but taking time in this phase of work helps models be developed with aesthetics, structure, and visual storytelling in mind.
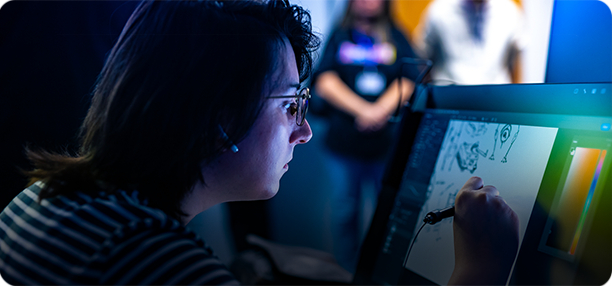
5. Texturing and Materials
This is the fun and visually interesting stage of your character development. Tools like Substance Painter or Blender’s texture paint let you develop skin tones, fabric textures, surface metals, and environmental scratches and wear.
The key factor is to understand how different materials interact with light. Regardless of your materials, skin, cloth or armour, when you get the material properties right, it enhances the realism and depth of your work.
6. Rigging and Posing
Even a static character benefits from posing. Rigging involves building a skeletal structure inside your model, allowing for movement and expression. Once rigged, you can adjust your character’s posture, facial expressions, and hand gestures to create compelling final renders.
Rigging also helps test how well your topology deforms under movement — an essential skill for any aspiring character artist aiming for game or animation pipelines.
7. Lighting, Rendering, and Final Presentation
Finally, you’ll showcase your work with proper lighting and rendering. A simple three-point lighting setup — key, fill, and rim lights — helps emphasise your character’s forms and details.
Use neutral backgrounds to keep the focus on your model, and render multiple views: front, side, ¾ turn, close-ups, and turntables. Software like Blender’s Cycles/Eevee or Marmoset Toolbag provides excellent rendering options.
Avoiding Common Mistakes in 3D Character Design
Even talented beginners often stumble on simple, preventable mistakes. Here are a few to keep in mind:
- Skipping references leads to poor anatomy and stiff designs.
- Adding fine details too early often results in wasted hours correcting proportions later.
- Messy topology can break your model during rigging and animation.
- Bad UV mapping causes stretching or blurring of your textures.
- Overly dramatic rendering distracts from your character’s actual design.
For a deeper dive into these and other pitfalls, visit: [Avoid these common mistakes in 3D character design →]
Choosing the Right Software for 3D Character Design in 2025
Your choice of software directly impacts your learning curve and career readiness. In 2025, here’s where beginners should focus:
- Blender – The perfect all-in-one free tool for modeling, sculpting, rigging, texturing, and rendering.
- ZBrush – Industry-standard for high-detail sculpting.
- Maya – The go-to for rigging and animation pipelines.
- Substance Painter – Industry leader for texturing.
- Unreal Engine / Unity – Essential for real-time rendering and game integration.
Start with Blender to master the core workflow. Once comfortable, expand into specialised software as your projects demand.
Still confused about which software stack is right for you? Get clarity with our guide: [Choose the right software for 3D character design in 2025 →]
Building a Portfolio That Stands Out
A strong portfolio isn’t just about finished renders; it’s about demonstrating your full process. Studios want to see your ability to move through the entire pipeline — from ideation to final render — and solve problems along the way.
Here’s what your beginner portfolio should include:
- Initial sketches and moodboards.
- High-res sculpt breakdowns.
- Wireframe views of clean topology.
- Texturing and material passes.
- Multiple final renders (different angles and close-ups).
- Turntables or simple animation loops.
- Short notes explaining your workflow and tools used.
Remember: It’s better to showcase 3 well-executed projects than 10 rushed ones.
If you’re serious about building a job-ready portfolio, explore our complete breakdown: [Stand out with the right 3D character design portfolio →]
How MAGES Institute Helps You Master the Full Pipeline
While self-learning has its place, structured mentorship dramatically shortens the learning curve. At MAGES Institute, the 3D Modelling & Game Art Diploma is designed to give you:
- Full mastery over every step of the 3D character design workflow.
- Hands-on training in Blender, Maya, Substance Painter, ZBrush, and Unreal Engine.
- Mentorship from seasoned industry professionals.
- Portfolio development that aligns with actual studio hiring standards.
- Project-based learning that reflects real-world production scenarios.
Whether your goal is to work in games, animation, film, or virtual production, MAGES ensures you graduate with both technical skill and industry credibility.
Frequently Asked Questions
Q1: How long does it take to be competent in 3D character design?
Most beginners will get a good foundation in 6-12 months of ongoing practice.
Q2: Do I need to be able to draw?
You don’t have to, but knowing how to draw is helpful for anatomy, proportion and concept development.
Q3: Can I learn with only free software?
Yes. Blender has an entire free pipeline. Most professionals start off with Blender and then move into paid software.
Q4: How many characters do I need in my first portfolio?
Base it on 3-5 completed characters showing diversity in style, anatomy and complexity.
Q5: Can I only specialise in sculpting?
Yes — except studios want artists who have other skills, too, like topology, texturing, rigging, and rendering.
Final Thoughts
Learning 3D character design for beginners isn’t about relentless tutorials; it’s about building sane workflows, practising constantly, and learning how to show your work professionally.
By adhering to a well-defined pipeline — from idea through to rendering — you will be building your creative intuitions, as well as your technical ability.
If you are serious about working in 3D character design, programs like MAGES Institute’s 3D Modelling & Game Art Diploma have the mentorship, structure and portfolio coaching to help turn your skill into studio-ready talent.
Related Posts
SPEAK TO AN ADVISOR
Need guidance or course recommendations? Let us help!